


Introduction
I still remember my first attempt at creating a vivid twist on everyday salt. Though it looked more like a messy science experiment back then, it sparked a fascination in me for colorful kitchen transformations. That’s when I started perfecting my blue salt trick recipe—a method I’m excited to share with you today. This recipe serves as a fun, beginner-friendly way to add a gorgeous hue to your dishes, and it also allows you to entertain friends with a quick and surprising hack.
I’m not a professional scientist, but I’ve spent my fair share of time tinkering with various ingredients to nail down an easy blue salt trick tutorial. Through trial and error, I discovered how to make blue salt at home using simple, budget-friendly items. In this article, I’ll walk you through my personal experiences, step-by-step instructions, and some irresistible ideas for plating.
Whether you’re curious about a DIY colored salt recipe, hoping for a quick blue salt hack for cooking, or looking for an eye-catching plating option for a special gathering, I believe you’ll walk away feeling confident. By the end, you’ll have your own batch of color-changing salt ready to sprinkle on a fun party dish or even craft creative ways to use blue salt in recipes. Let’s dive in!
My Personal Discovery
I first stumbled upon this blue salt trick recipe when I was trying to add extra flair to a birthday meal for a close friend. The idea of creating bright garnishes intrigued me, yet I felt intimidated. I’d had occasional luck with tinted sugars for desserts, but salt was uncharted territory. I remember telling myself: “If I can color sugar, I bet I can color salt one way or another.”
During my initial attempts, I almost gave up. I poured what seemed like a mountain of food coloring into a mixing bowl, only to realize my salt clumped into one stiff lump. But I’m persistent. I kept adjusting the liquid-to-salt ratio, used different techniques to scatter dyes evenly, and eventually found success with a combination of food color and gentle drying. Each mini success propelled me to keep trying—at one point, I sprinkled so much color that I ended up with a deep blue stain on my countertop for weeks! Although my kitchen looked like a painter’s studio, it was a fun (and slightly messy) learning opportunity I’ll never forget.
Ingredients & Equipment
Over time, I’ve found a streamlined approach that requires just a handful of supplies. My personal preference is to keep it super simple while still delivering a vibrant final result.
Essential Ingredients
- Salt (¾ cup): I use coarse sea salt for visual appeal, but table salt works if you prefer a finer texture.
- Blue Food Coloring (4–5 drops): Gel-based color typically brings the brightest hue. You can also experiment with natural bluish dyes if that’s your preference.
- Lemon Juice (1 teaspoon, optional): Helps lighten or brighten the shade, making the color pop more.
- Cornstarch (¼ teaspoon, optional): This can ward off clumping, especially if you live in a humid climate.
Equipment
- Mixing Bowl: A medium-sized bowl for stirring.
- Spoon or Spatula: For combining salt and other ingredients.
- Parchment Paper: To lay out the salt while it dries.
- Measuring Spoons: Helpful for keeping track of optional ingredients.
- Oven or Airy Spot: To dry out the salt if it becomes too damp.
I personally keep an eye on my color consistency by spreading the salt out on a small white plate as I stir. That way, I have a good visual reference. You might also want to keep some paper towels handy—things can get splattery!

Step-by-Step Instructions
I’ve always found it reassuring to follow a detailed method. With this blue salt trick recipe, preparation is minimal, so most of your effort goes into achieving and fine-tuning the color.
Step 1: Initial Mixing
- Measure Your Salt
Pour about ¾ cup of salt into your mixing bowl. You might decide to do more or less, depending on how many servings or garnishes you want. - Add Food Coloring
Start with 4 drops of blue food coloring. In my experience, it’s best to begin small. You can always introduce another drop to boost intensity. - Optional Lemon Juice
If you want a more vibrant shade, stir in about 1 teaspoon of lemon juice. I adore the gentle tang this can impart—your salt remains salty, but there’s an extra spark of freshness in the aroma. - Combine Gently
Use your spoon or spatula to fold the color evenly into the salt. You’ll see patches of bright blue forming before it all begins to blend together into a uniform shade.

Step 2: Adjust Texture and Dry
- Check Your Consistency
At this point, you may notice clumps if your salt absorbed too much liquid. I usually press the lumps gently against the side of the bowl to break them apart. - Sprinkle Cornstarch (Optional)
For regions with higher humidity, or if your mixture feels a bit wet, a light dusting of cornstarch can help. Add about ¼ teaspoon while stirring, and watch it work its magic to keep each grain separate. - Spread on Parchment Paper
Transfer your colored salt onto a sheet of parchment paper. Spread it out in a thin layer so it can dry thoroughly. If you’re in a hurry, you can also place it in the oven at the lowest temperature (about 170°F or 75°C for 15 minutes) to speed up the drying process. Just be sure to keep an eye on it so it doesn’t scorch.

Step 3: Ready to Use
- Cool Down
If you heated your salt, let it cool on the counter for 5–10 minutes. You’ll notice the color becomes a bit more pronounced when the salt is fully dry. - Store or Serve
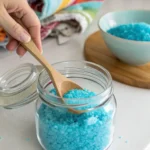
Transfer your finished product into an airtight container. In my kitchen, I keep it in a small glass jar for easy sprinkling.

I can’t help but grin whenever I see those sparkling blue crystals. This blue salt trick recipe might look simple, but I promise you’ll have no shortage of fun ways to use it in the kitchen.
Tips & Techniques
- Test the Color Gradually: Initially, I recommend fewer drops of color. You can always incorporate extra drops if you want a brighter punch.
- Use Gloves: Blue food dye can lightly stain your fingers. If you’re worried about finger discoloration for the next day or so, wear gloves. Trust me—scrubbing those knuckles isn’t the best way to spend a free afternoon!
- Flavor Twists: Beyond the optional lemon juice, you can experiment with other natural color enhancers (spirulina powder, for instance) or flavor extracts. This can open up new possibilities for unique blue salt flavor ideas.
- Storage: Moisture is usually the enemy of crunchy, well-textured salt. Keep your container sealed, and store it in a cool, dry spot. I typically store mine for up to three months without any problem.
Variations & Serving Ideas
I’ve had a blast testing different forms of this recipe, from sprinkling it on everyday dishes to presenting a fun party dish with blue salt as the main highlight. Below are some creative ways to use blue salt in recipes, all based on my own kitchen escapades.
- Rim for Mocktails: Wet the rim of a glass with a citrus wedge, then dip into your colored salt for a festive, bright blue look.
- Bake & Sprinkle: For certain bread or cracker recipes, a dash of colored salt on top can create a memorable finish. It also stands out brilliantly if the dough is pale.
- Eye-Catching Plating: A small pinch at the center of a plate, or a line drawn across a dish, can turn an ordinary meal into a presentation that’s sure to ignite a conversation.
- Garnish For Light Sauces: I once served a creamy cauliflower sauce with a small swirl of vibrant salt in the center. Friends didn’t just find it delicious—they raved about the pop of color.
If you love to experiment, I encourage you to try pairing this salt with bright veggies or a vegetarian dish. It especially looks striking against the warm tones of roasted sweet potatoes or golden-brown tofu.
Nutritional Info & Storage
While salt intake should generally be kept in moderation, I enjoy having a pinch of this bright seasoning in my kitchen arsenal. On average, a single teaspoon of salt contains about 2,300 milligrams of sodium, according to USDA guidelines. My personal practice is to be mindful of my overall sodium consumption each day, but I love having the option to swap in a quick blue salt hack for cooking excitement when the moment calls.
Approximate Nutrition (per 1 teaspoon)
- Calories: 0
- Sodium: ~2,300mg
- Fats & Sugars: 0
- Additional Nutrients: Minimal
Of course, I’m not a medical professional, so if you have specific questions about sodium intake or health concerns, please check with a qualified expert.
Storage Duration: If sealed tightly, your colored salt can last up to three months (sometimes more, depending on humidity). I keep mine in a mason jar with a silicone ring to lock out moisture. If you notice clumping after a while, a quick stir or another mini dash of cornstarch can solve the issue.
Common Pitfalls I’ve Encountered
- Adding Too Much Liquid: I once poured in so much food coloring that my salt looked like slush. If this happens, spread it on parchment and dry it longer, or add fresh salt to balance the moisture.
- Forgetting About Heat: If you use the oven to speed-dry your salt, be sure to keep temperatures very low. A short moment of inattention might cause the salt to lose its bright hue.
- Stains Everywhere: When I started, I had bright blue splotches on my countertop for days. Considering protective measures like gloves and parchment paper can keep your kitchen from turning into a tie-dye project.
Why This Blue Salt Trick Recipe Works for Me
This recipe merges the fun aspect of a kitchen project with a practical finishing touch for recipes. The goal is a vibrant blue salt that’s eye-catching and easy to use. From experience, minimal ingredients and clear steps make it a friendly project at home, even if you don’t consider yourself an expert in color modifications. There’s also something inherently joyful about swirling bright color through tiny crystals—you get a sense of wonder every time you watch the transformation happen.
I also find it to be an excellent conversation starter at gatherings. People often ask, “How on earth did you get your salt to be so blue?” That’s the moment I get to reveal my little secret about the blue salt trick recipe and how easy it is to replicate at home.
When plating, you’ll likely appreciate how it stands out against white plates or on top of lighter-colored sauces. Plus, your kids (if you have any) or younger family members might love jumping in to help with stirring and seeing the color appear. Just be prepared for a little bit of cleanup!
Serving Suggestions and Meal Planning
I like to pair this salt with dishes that are mild in flavor so the color and taste become more apparent. It might be a simple culinary blue salt technique, but these are personally tried-and-tested favorites:
- Grain Bowls: Drizzle a homemade dressing over quinoa or brown rice, then top with roasted chickpeas and a sprinkle of blue salt.
- Hot Appetizers: Potato wedges or sweet potato fries get an instant face-lift with a pinch of vibrant salt sprinkled right after they come out of the oven.
- Fresh Salads: In a crisp green salad with lettuce, cucumbers, and a punchy vinaigrette, a dash of colored salt entices the eye before the first bite.
Sometimes, I cook in bigger batches if I’m hosting a group. I’ll warn you: folks get curious about that bright finishing salt sitting in the middle of the dinner table!
If you’re curious about costs, a small bottle of blue food coloring typically lasts through multiple rounds. The rest of the ingredients—like salt, lemon juice, and cornstarch—are kitchen staples I always have on hand. That means the budget for this project is genuinely low, making it a fun addition to your cooking routine.
Conclusion
I hope you’ll enjoy the same curiosity and satisfaction I’ve experienced with this blue salt trick recipe. It took me a few tries to fine-tune the method, but the pay-off is a playful ingredient that continues to wow my friends, especially at casual get-togethers. Whether you use it for everyday meals or reserve it for special gatherings, you’ll appreciate how this simple culinary trick can enliven your plate.
Thank you for joining me on this colorful culinary journey! If you’d like more fun and creative recipes, feel free to check out my
Facebook Page. I regularly share my personal cooking wins, occasional mishaps, and all the tips I pick up along the way. Take a leap and give this recipe a try. I can’t wait to hear about your bright blue transformations!
Frequently Asked Questions
Can I make this recipe without food coloring?
Yes! Using natural dyes like butterfly pea powder can bring a bluish tone to salt, although it may not appear as vibrant. You’d simply mix it in just like the food coloring.
What if my salt never gets fully dry?
If your salt remains damp, spread it in a thin layer on a parchment-lined tray. Leave it in a low-temperature oven (about 170°F or 75°C) for 10–15 minutes, checking periodically to prevent over-drying.
Is this beginner-friendly blue salt recipe safe for kids to help with?
Absolutely. It’s straightforward to follow, but an adult should supervise when using the oven or handling food color to avoid stained surfaces.
Can I freeze colored salt?
Technically, you can store salt in a freezer-safe container, but there isn’t a strong advantage. I find an airtight jar in a room-temperature pantry works well.
Will this blue salt garnish ideas work for sweet dishes?
It depends on your palate. While sweet desserts can get a salty-sweet punch from regular salt, the blue tint usually pairs better with savory or neutral flavors. You can certainly experiment!
Do I need fresh lemon juice, or can I use bottled?
You can use bottled juice if that’s what you have on hand. The freshness might be slightly different, but it still does the job of brightening the hue.
How long does the color stay vibrant?
If stored properly, the color typically retains its brightness for up to three months. After that, it may start to fade slightly, though you can refresh it with a new round of mixing if needed.
Thank you for reading! I can’t wait to find out how your blue salt trick recipe turns out. Hop over to my
Facebook Page to follow along and share your experiences. May your cooking adventures always involve a touch of fun color!
Unveiling the Blue Salt Trick Recipe: A Must-Try Secret!
- Prep Time: 10 minutes
- Cook Time: 15 minutes
- Total Time: 25 minutes
- Yield: 1 jar of colored salt 1x
- Category: Seasoning
- Method: Mixing, Drying
- Cuisine: N/A
Description
A fun and beginner-friendly recipe to create vibrant blue salt at home, perfect for adding a colorful twist to dishes and entertaining guests with a quick kitchen hack.
Ingredients
- ¾ cup salt – I use coarse sea salt for visual appeal, but table salt works if you prefer a finer texture.
- 4–5 drops blue food coloring – Gel-based color typically brings the brightest hue. You can also experiment with natural bluish dyes if that’s your preference.
- 1 teaspoon lemon juice – Optional; helps lighten or brighten the shade, making the color pop more.
- ¼ teaspoon cornstarch – Optional; helps ward off clumping, especially in humid climates.
Instructions
- Measure Your Salt
Pour about ¾ cup of salt into your mixing bowl. You might decide to do more or less, depending on how many servings or garnishes you want. - Add Food Coloring
Start with 4 drops of blue food coloring. In my experience, it’s best to begin small. You can always introduce another drop to boost intensity. - Optional Lemon Juice
If you want a more vibrant shade, stir in about 1 teaspoon of lemon juice. I adore the gentle tang this can impart—your salt remains salty, but there’s an extra spark of freshness in the aroma. - Combine Gently
Use your spoon or spatula to fold the color evenly into the salt. You’ll see patches of bright blue forming before it all begins to blend together into a uniform shade. - Check Your Consistency
At this point, you may notice clumps if your salt absorbed too much liquid. I usually press the lumps gently against the side of the bowl to break them apart. - Sprinkle Cornstarch (Optional)
For regions with higher humidity, or if your mixture feels a bit wet, a light dusting of cornstarch can help. Add about ¼ teaspoon while stirring, and watch it work its magic to keep each grain separate. - Spread on Parchment Paper
Transfer your colored salt onto a sheet of parchment paper. Spread it out in a thin layer so it can dry thoroughly. If you’re in a hurry, you can also place it in the oven at the lowest temperature (about 170°F or 75°C for 15 minutes) to speed up the drying process. Just be sure to keep an eye on it so it doesn’t scorch. - Cool Down
If you heated your salt, let it cool on the counter for 5–10 minutes. You’ll notice the color becomes a bit more pronounced when the salt is fully dry. - Store or Serve
Transfer your finished product into an airtight container. In my kitchen, I keep it in a small glass jar for easy sprinkling.
Notes
Be cautious with food coloring to avoid staining surfaces or skin. Store the colored salt in a sealed container to maintain freshness.
Nutrition
- Serving Size: 1 teaspoon
- Calories: 0
- Sugar: 0g
- Sodium: 2300mg
- Fat: 0g
- Saturated Fat: 0g
- Unsaturated Fat: 0g
- Trans Fat: 0g
- Carbohydrates: 0g
- Fiber: 0g
- Protein: 0g
- Cholesterol: 0mg

Leave a Comment