


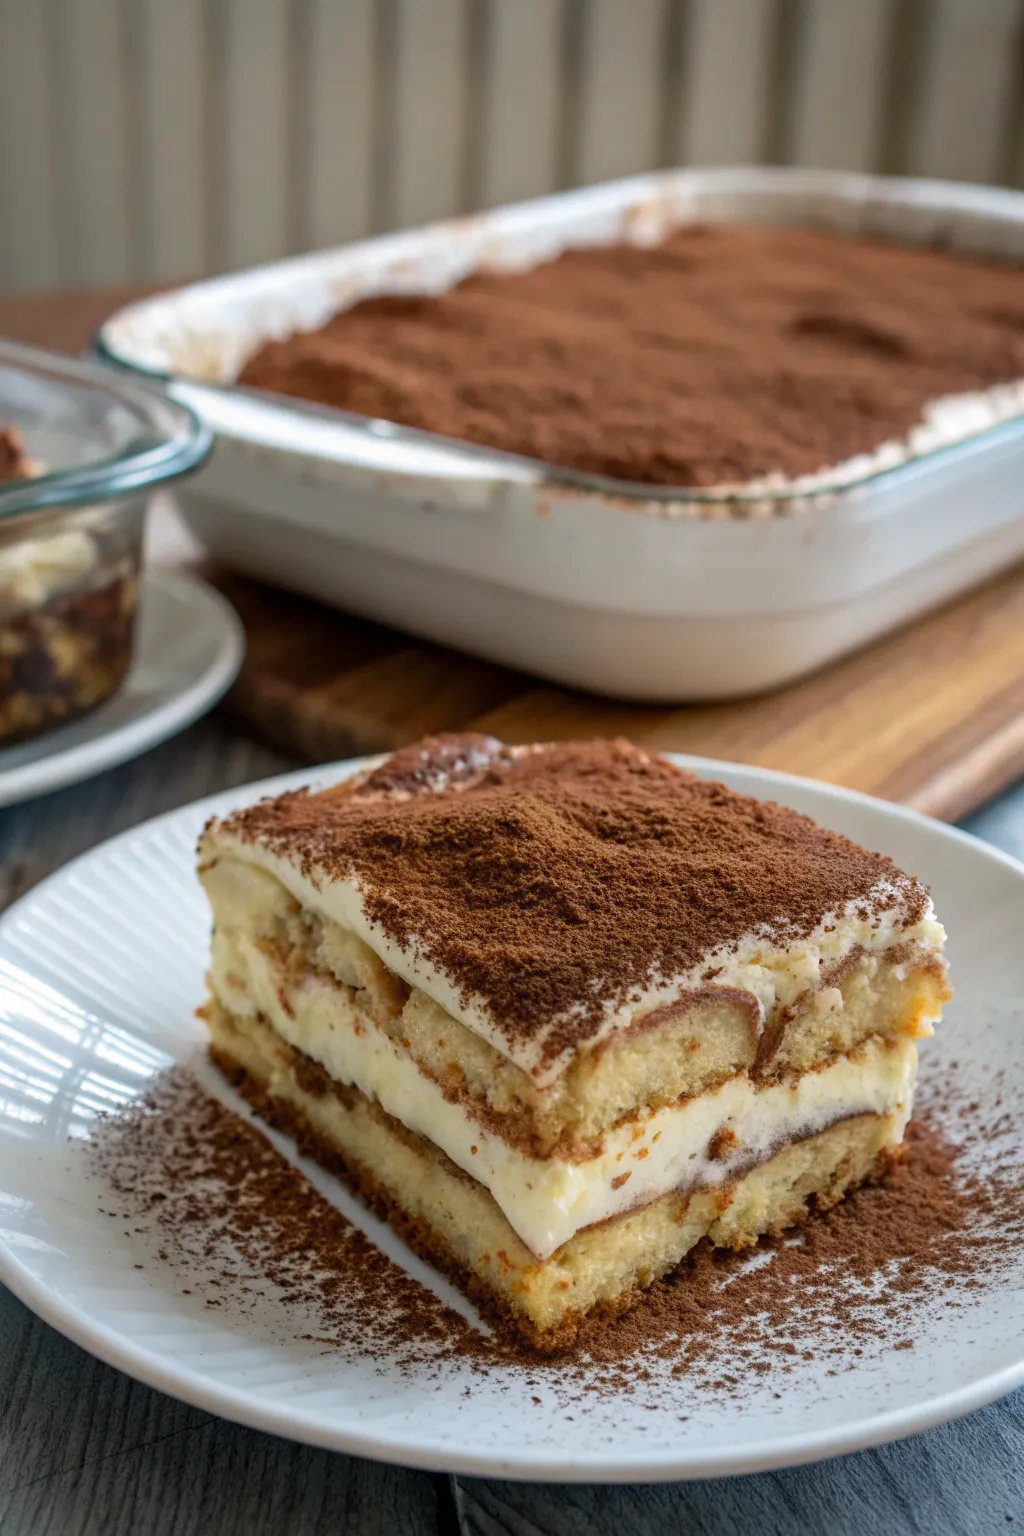


My First Encounter With Mini Tiramisu Delights
I still remember the day I stumbled upon this tiramisu mini dessert recipe at a friend’s gathering. Years ago, I attended a birthday party where the host offered small dessert cups that looked incredibly tempting. One sip of that creamy coffee layer, and I was hooked. I instantly asked how those tiny wonders were made, only to discover they were basically a smaller version of classic Italian mini tiramisu desserts.
Months later, I tried recreating them in my own kitchen. I went through several rounds of testing, and there were definitely moments of miscalculation. I once shallowly dipped my ladyfingers in black coffee for too long, completely drenching them into a soggy mess. Another time, I whipped my mascarpone mixture in such a hurry that I ended up with lumps I couldn’t get rid of! These experiences taught me patience and reminded me that a solid method is key when working on something as specific as a tiramisu mini dessert recipe.
If you share my love for quick no-bake mini tiramisu cups, keep reading because I’m about to walk you through my favorite version of this recipe. It’s a small batch tiramisu recipe for parties or any occasion where individual tiramisu dessert shots are preferred. I’ll include substitute options for those who might need them, share a few personal tips I’ve gathered over time, and touch on common snags you might hit. Let’s get you whipping up some creamy and fluffy mini tiramisu delights in no time!
Ingredients and Essential Tools
Before we dive into the specifics of assembling these layered mini tiramisu dessert cups, let’s talk ingredients and tools. Over time, I’ve tried different variations, like using gluten-free ladyfingers or opting for nut-based coffee creamers. The good news is that the overall recipe remains the same—it’s quite flexible.
Here’s everything I keep on hand:
- Ladyfingers (8–10 pieces): Serve as the base. I prefer the crunchy version, but you can pick softer ones if that’s your preference.
- Mascarpone cheese (8 ounces): Gives that rich, velvety texture.
- Heavy cream (½ cup): Contributes fluffiness.
- Granulated sugar (¼ cup): Adjust to your desired sweetness.
- Brewed black coffee (1 cup): Freshly brewed for a bold coffee flavor.
- Unsweetened cocoa powder or shaved chocolate (for dusting): Adds the classic finishing touch.
- Vanilla extract (1 teaspoon): Provides a subtle aroma.
Possible Ingredient Swaps
- Dairy-Free Options: You can use coconut cream instead of heavy cream. Mascarpone can be replaced with a non-dairy cream cheese if available.
- Sugar Alternatives: Honey or maple syrup can work if you don’t want to rely on granulated sugar.
- Instant Coffee Substitute: If you’re short on time, instant coffee can replace brewed coffee. Just be mindful of the intensity.
Kitchen Tools You’ll Need:
1. A mixing bowl (preferably chilled)
2. Hand mixer or stand mixer (for whipping)
3. A shallow dish for dipping ladyfingers
4. Measuring cups and spoons
5. A spatula (for folding the mascarpone mixture)
6. Single-portion cups, small jars, or dessert shooters for serving
7. Plastic wrap for covering the desserts while chilling
I tend to keep my mixing bowl and whisk attachment in the refrigerator for about 10 minutes before I start; the coolness helps the cream whip faster. This personal habit developed after my first attempt at making these mini tiramisu bites with ladyfingers resulted in a runny topping because my ingredients weren’t cold enough.

Why I Love This Tiramisu Mini Dessert Recipe
I’m a huge fan of coffee-infused desserts. If you’re like me and adore the taste of a strong cup of java woven into a sweet treat, this tiramisu mini dessert recipe will be right up your alley. The ratio of coffee-dipped ladyfingers to creamy mascarpone is just perfect. You get a balanced bite that isn’t too heavy, making it suitable for people who prefer a lighter sweet ending.
Another reason I keep returning to this simple mini tiramisu treat is the chance to prep them in personal tiramisu portion cups. At family gatherings, individual servings allow each person to revel in the layers without causing the typical scramble for the last serving in a big dish. It’s also practical for potlucks or smaller dinner parties.
When the weekend hits, I love whipping up a small batch so that I can indulge in a single-serve tiramisu shooter recipe (or two) after dinner. The no-bake element is very appealing. No oven means fewer steps and fewer things that can go wrong, right? Even better, these portable tiramisu jar cakes travel easily if you need to bring them to a friend’s place.
Step-by-Step Instructions
You’re probably eager to start layering. Let’s get into the how-to details. This method has evolved through plenty of personal trial and error, so I’ll point out little pitfalls along the way. The key steps involve whipping, dipping, layering, and chilling. Let’s break it down:
- Brew Your Coffee and Let It Cool
- I prepare a strong cup to get that bold coffee essence. After brewing, let it sit until it’s only slightly warm or even at room temperature. Too hot, and it might interfere with the ladyfingers’ texture.
- Sometimes I add a pinch of sugar to the coffee if I want a sweeter base, but this is optional.
- Whip the Cream with Sugar and Vanilla
- Pour heavy cream into a chilled bowl, toss in the sugar, and add vanilla extract.
- Use a hand mixer (or stand mixer) on medium speed. Watch carefully for soft peaks. Overwhipping leads to curdled textures. Aim for a slightly stiff but still smooth consistency.
- My personal note: I like to stop and check consistency at the one-minute mark. I was once too hasty and ended with butter-like lumps.

- Combine Whipped Cream with Mascarpone
- In a separate bowl, give the mascarpone cheese a gentle stir to soften it up. Then fold the whipped cream mixture right in.
- Switch to the lowest speed on your mixer if needed, or fold manually with a spatula for more control. You want a united, fluffy texture.
- Personal tip: If the mascarpone is straight from the fridge, let it sit on the counter for about 5 minutes to reduce lumps.
- Dip Ladyfingers in Coffee
- Pour your cooled coffee into a shallow dish. I dip each ladyfinger quickly—about 2 seconds on each side.
- If you’re inexperienced with this step, try a test dip on one ladyfinger. The goal is a slight soak that keeps the cookie’s structure.
- I’ve noticed if I get distracted, even a second too long can lead to a squishy cookie that can’t hold up in the dessert cup.
- Layer the Dessert Cups
- Grab your dessert cups or small jars. Start by placing a coffee-dipped ladyfinger (or half of one) at the bottom.
- Spoon or pipe a layer of the creamy coffee-flavored mini tiramisu mixture on top.
- Repeat this layering until you reach the top of the cup. I typically do two layers of ladyfingers and two layers of cream.
- Level off the top with a spoon or spatula.
- Chill the Cups
- Cover each cup with plastic wrap, or arrange them in a tray with a lid.
- Refrigerate for at least 3 hours. Overnight is even better if you have the patience. The flavors mingle beautifully over time.
- Dust with Cocoa Powder
- Right before serving, dust a fine layer of cocoa powder on top. Otherwise, you can drizzle melted chocolate or top them with shaved chocolate.
- Make sure you do it just before presenting so the cocoa powder remains on the surface without sinking in.

Cooking Step #2 Clarification
In my kitchen routine, Steps 2 and 3 often blend into one if I’m feeling confident about timing. However, separating them can be helpful if you’re mixing by hand or want a slower approach to gauge the cream’s texture. This separation also saves you from accidentally over-mixing the mascarpone into the whipped cream, which could muddy the consistency.

Tips, Tricks, and Flavor Twists
- Quick Tiramisu Dessert in Mini Jars: Mason jars or small jam jars create a homier feel. They’re also an easy way to transport your bite-sized mascarpone tiramisu cups to events.
- Experiment with Cocoa Powder Flavors: If you’re feeling adventurous, mix a bit of cinnamon or nutmeg into the cocoa dust. It adds an extra warm note.
- Texture Check: Keep an eye on your whipped cream. Underwhipped cream will cause the mixture to run. If it looks too soft, give it a few more turns with the whisk.
- Garnish Options: Some folks love chocolate curls, mocha sprinkles, or even fresh berries on top. I sometimes grate a hint of dark chocolate right before serving for added texture.
- Freezing: I’ve tried freezing them for about a week. The texture remains lovely after thawing in the fridge, making these quick no-bake mini tiramisu cups a good candidate for prepping in advance.
Personal Anecdotes and Common Pitfalls
I once left the mascarpone out too long on a hot day. When it was time to start mixing, it had lost its firmness. The dessert still tasted good, but the structure wasn’t as neat. Since that mishap, I keep everything well-chilled before I begin.
Another mini fiasco was when I used decaf coffee. Some might love that, but I found it lacked the robust flavor that truly complements these personal tiramisu portion cups. If you prefer milder coffee, you can do it, but I warn you that the flavor profile might not be as pronounced.
Probably my biggest caution is about oversoaking the ladyfingers. The first time I made these layered mini tiramisu dessert cups, I ended up with a mushy base that nearly leaked through the cup. Two-second dips on each side are usually just right!
How to Store and Serve
After all that care, you’ll want to store these properly. I keep them covered in the fridge for up to three days. Once you’re ready to serve, let them rest at room temperature for about 10 minutes. This slight warming helps the flavors stand out better, especially the coffee infusion.
If you have leftovers (and that’s a big “if” in my kitchen!), just pop them in an airtight container. The ladyfingers continue to soften over time, so the texture might be slightly different after a couple of days, but the flavor remains satisfying.
Nutritional Snapshot
I’m not a medical professional, so this is just my personal guess based on typical servings. For a small cup (one serving), the approximate breakdown could be:
| Component | Approximate Amount |
|---|---|
| Calories | 300–350 |
| Total Fat | 20–25g |
| Carbohydrates | 20–25g |
| Protein | 4–6g |
The exact numbers vary depending on the brand of ingredients, but this gives you a rough idea. If you have any specific dietary concerns, it’s always smart to consult with a nutrition expert.
Serving Suggestions and Pairing Ideas
I love having this tiramisu mini dessert recipe alongside a cup of hot espresso or tea. The flavors complement each other perfectly. If you’re hosting a larger event, consider pairing them with light bites like fruit salad, fresh berries, or crisp cookies to round out the dessert table.
For me, these cream-topped individual tiramisu dessert shots are a great closing to a hearty meal of pasta or a bright summer salad. As an added flourish, you can pipe a swirl of whipped cream on top and sprinkle extra cocoa. That final decorative element often makes folks smile before they even pick up their spoon.
Frequently Asked Questions
How can I make this recipe gluten-free?
To make this tiramisu mini dessert recipe gluten-free, use gluten-free ladyfingers. Most other ingredients, like mascarpone, cream, and coffee, are already free of gluten. Double-check ingredient labels to be absolutely certain.
Can I skip the coffee altogether?
If you can’t have coffee, you can dip ladyfingers in hot chocolate or even a robust tea. Just keep in mind that the signature coffee flavor is a key part of the classic taste, but you can still have an enjoyable dessert with an alternative liquid.
What if I don’t have mascarpone?
In a pinch, cream cheese can be substituted, though you might sense a slight tanginess. Another alternative is strained Greek yogurt, but you may lose some of that rich, authentic flair.
Can I freeze these mini tiramisu cups?
Yes, you can. I’ve done it successfully when I needed to plan desserts in advance. Wrap them in plastic and foil, then tuck them into the freezer. Thaw them in the fridge for several hours before serving.
Do I need any special equipment?
All you really need is a mixer (hand or stand), a shallow dish, and small serving cups. If you want to get fancy with the presentation, a piping bag can help achieve neat layers of the mascarpone mixture.
How far in advance can I make them?
I find that preparing them a day in advance can boost the flavor because it allows the coffee to meld with the creamy filling. Just dust the top with cocoa right before serving.
Cost and Budget Notes
Ingredients like mascarpone and ladyfingers vary in cost depending on where you shop. For me, a pack of ladyfingers usually lasts through two or three batches of these creamy coffee-flavored mini tiramisu desserts. When I’m budgeting, I try to buy mascarpone on sale and keep it handy until I’m ready. The entire set of ingredients usually comes in at a moderate price point, proving that you don’t always need expensive supplies to make a fancy-tasting dessert.
Wrapping Up My Tiramisu Mini Dessert Journey
This tiramisu mini dessert recipe has become my go-to for any celebration that calls for something sweet and creamy. From the time I first tried those individual tiramisu dessert shots at a friend’s party, to today, I’ve refined my process to the point where I can confidently whip them up without stress. The heart of this dessert is the same as the traditional tiramisu in small servings: flavor-packed, velvety, and downright fun to eat.
Whether you opt for a simple mini tiramisu treat in a clear dessert cup or you get creative with layered mini tiramisu dessert cups in mason jars, they always bring a little excitement to the table. If you give these personal tiramisu portion cups a try, let me know how they turn out. You can also check out more recipe ideas on my Facebook Page.

If you want a coffee-packed dessert that’s small, convenient, and super satisfying, I hope you’ll try this tiramisu mini dessert recipe. It’s great for those moments when you need a sweet pick-me-up or want to impress dinner guests with a dessert that looks fancy but is actually quite easy. Enjoy every spoonful!
Print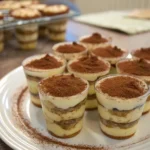
Unleash Your Inner Chef: Tiramisu Mini Dessert Recipe Secrets!
- Prep Time: 30 minutes
- Cook Time: 0 minutes
- Total Time: 3 hours 30 minutes
- Yield: 8–10 mini dessert cups 1x
- Category: Dessert
- Method: No-Bake
- Cuisine: Italian
Description
A small batch tiramisu recipe for creamy and fluffy mini dessert cups, perfect for parties or individual servings.
Ingredients
- 8–10 pieces ladyfingers – Crunchy version preferred
- 8 ounces mascarpone cheese – Rich, velvety texture
- ½ cup heavy cream – Contributes fluffiness
- ¼ cup granulated sugar – Adjust to desired sweetness
- 1 cup brewed black coffee – Freshly brewed for bold coffee flavor
- For dusting unsweetened cocoa powder or shaved chocolate – Classic finishing touch
- 1 teaspoon vanilla extract – Subtle aroma
Instructions
- Brew Your Coffee and Let It Cool
- Prepare a strong cup of coffee and let it cool to slightly warm or room temperature.
- Optional: Add a pinch of sugar for a sweeter base.
- Whip the Cream with Sugar and Vanilla
- Pour heavy cream into a chilled bowl, add sugar and vanilla extract.
- Use a hand mixer on medium speed until soft peaks form.
- Check consistency after about a minute.
- Combine Whipped Cream with Mascarpone
- Soften mascarpone cheese and fold into whipped cream for a fluffy texture.
- Fold gently to ensure a united mixture.
- Let mascarpone sit for 5 minutes if cold to reduce lumps.
- Dip Ladyfingers in Coffee
- Quickly dip ladyfingers in cooled coffee for about 2 seconds per side.
- Ensure a slight soak without making them squishy.
- Layer the Dessert Cups
- Place a coffee-dipped ladyfinger at the bottom of cups.
- Add a layer of the creamy mixture on top.
- Repeat layering ladyfingers and cream until reaching the top.
- Level off the top with a spoon or spatula.
- Chill the Cups
- Cover with plastic wrap and refrigerate for at least 3 hours, preferably overnight.
- Dust with Cocoa Powder
- Dust cocoa powder on top just before serving.
- Alternatively, drizzle melted chocolate or top with shaved chocolate.
Notes
Keep mixing bowl and whisk attachment in the refrigerator for faster cream whipping. Avoid over-soaking ladyfingers in coffee to prevent a mushy base.
Nutrition
- Serving Size: 1 mini dessert cup
- Calories: 325
- Sugar: 20g
- Sodium: 50mg
- Fat: 22g
- Saturated Fat: 13g
- Unsaturated Fat: 9g
- Trans Fat: 0g
- Carbohydrates: 23g
- Fiber: 2g
- Protein: 5g
- Cholesterol: 60mg

Leave a Comment