


Introduction
I still remember the day I stumbled upon my very first air fryer chicken liver recipe. It happened almost by accident while I was experimenting with lighter ways to cook some of my favorite traditional dishes. Chicken livers have always been a staple in my kitchen—my grandmother used to make them in a cast-iron skillet, serving them with onions and a splash of homemade sauce. But when I discovered I could get that same crispy exterior without deep frying, it changed my usual routine.
I’m excited to share my own journey with this air fryer chicken liver recipe. It took a few tries for me to get that perfect balance of seasoning, texture, and that satisfying crunch. At one point, I left them cooking a tad too long, and they turned tough and slightly bitter. Another time, I forget to pat the livers dry, resulting in extra splatter. Through these little hiccups, I picked up tips that I’d love to pass along so you can skip right to the delicious part.
Before we get started, I’d like to show you what I use when prepping this dish. Seeing the raw ingredients laid out often makes me think of my past cooking sessions, trial and all. Let’s jump right in.

Why I Love This Crispy Air-Fried Chicken Liver Recipe
I’ve tried frying them in oil, baking them in the oven, and even grilling. But nothing gives such a crisp coating with minimal mess quite like an air fryer. It also resonates with those looking for healthy chicken liver recipes in an air fryer—less oil means fewer calories, which is always a bonus. As far as I’m concerned, the flavor still shines through, and I get to skip big pots of cooking oil.
Whether you want southern-style chicken livers in an air fryer or prefer a simple air fryer chicken liver dinner that’s quick and easy, this method offers plenty of room for variation. From panko-crusted chicken livers in an air fryer to no-breading options, there’s a lot of freedom here. Personally, I find that marinating the livers makes all the difference. Let’s look at the ingredients.
Ingredients
- 1 pound chicken livers, trimmed of any connective tissue
- 1 cup buttermilk (or your favorite non-dairy alternative for a gluten-free air fryer chicken liver idea)
- 1 teaspoon salt (I like kosher salt)
- 1 teaspoon ground black pepper
- 1 teaspoon smoked paprika (adds a great touch of flavor)
- 2 tablespoons all-purpose flour (optional, for a slight crispy coat)
- ½ cup bread crumbs or panko (optional for that crispy breaded chicken livers in air fryer feel)
- 2 tablespoons oil (avocado oil or olive oil—either can be the best oil for air-fried chicken livers)
- Optional extras: sliced onions, fresh herbs, or any spices you enjoy
Feel free to adapt these measurements to your preference. If you’re going for a keto-friendly air fryer chicken liver recipe, skip the flour and bread crumbs. For those who want a gluten-free version, you can sub in gluten-free flour and bread crumbs or omit them entirely.
Equipment I Use
- Air fryer (mine has a 3.7-quart capacity, but larger ones work just as well)
- Large bowl for marinating
- Paper towels or kitchen cloth to pat the livers dry
- Tongs or a spatula
- Cooking spray (sometimes helpful in getting a crisp exterior)
Some also like an extra tray to catch drips in case you’re planning on cooking air fryer chicken livers and onions. I often line that tray with foil for easy cleanup.
My Best Marinade for Air Fryer Chicken Livers
Through trial and error, I discovered that soaking the chicken livers in something acidic (like buttermilk or even a bit of yogurt) for at least 20–30 minutes makes them tender and less metallic-tasting. I once left them marinating overnight, and the result was almost too delicate. So half an hour strikes a good balance.
- Pour your chosen marinade (buttermilk or a non-dairy yogurt alternative) into a bowl.
- Stir in half of your seasonings: salt, black pepper, and a sprinkle of paprika.
- Drop the cleaned chicken livers into the mixture.
- Let them rest, covered, in the fridge for half an hour.
By the time you’re done, these livers will be primed for that crispy air-fried chicken liver recipe finish.

How to Cook Chicken Livers in an Air Fryer: My Step-by-Step
Here’s where the fun begins. I like to break down the process into a few manageable steps. You’ll see that once you prep your marinade, the rest is straightforward.
Step 1: Prepping the Livers
- Remove the livers from the marinade.
- Pat them gently with paper towels to remove excess moisture.
- In a small bowl, combine flour, bread crumbs (or panko), smoked paprika, and any other spices you prefer. If you’re looking for air fryer chicken livers without breading, you can skip this coating entirely and just season them.
Step 2: Coating (Optional)
- Lightly dredge each piece in your coating mix.
- Shake off any extra coating—you don’t want clumps.
- Set them aside on a plate, ready for the air fryer.

Step 3: Air Frying for Crispiness
- Preheat the air fryer to 375°F (around 190°C). Preheating helps the livers develop even crispness.
- Lightly spray or brush the air fryer basket with oil.
- Arrange the livers in a single layer—try not to crowd too many, or they might steam.
- Cook for about 8–10 minutes. Then carefully flip them over using tongs.
- Cook for another 3–5 minutes until they’re golden brown and the internal temperature hits at least 165°F (as recommended by USDA guidelines).
- Peek inside one piece to confirm it’s no longer pink or bloody. You want them tender, not chalky.

A Note on Onions
If you love air fryer chicken livers and onions, you can toss sliced onions in a bit of oil and place them in the basket alongside the livers during the final 5–7 minutes. They caramelize beautifully without overshadowing the main attraction.
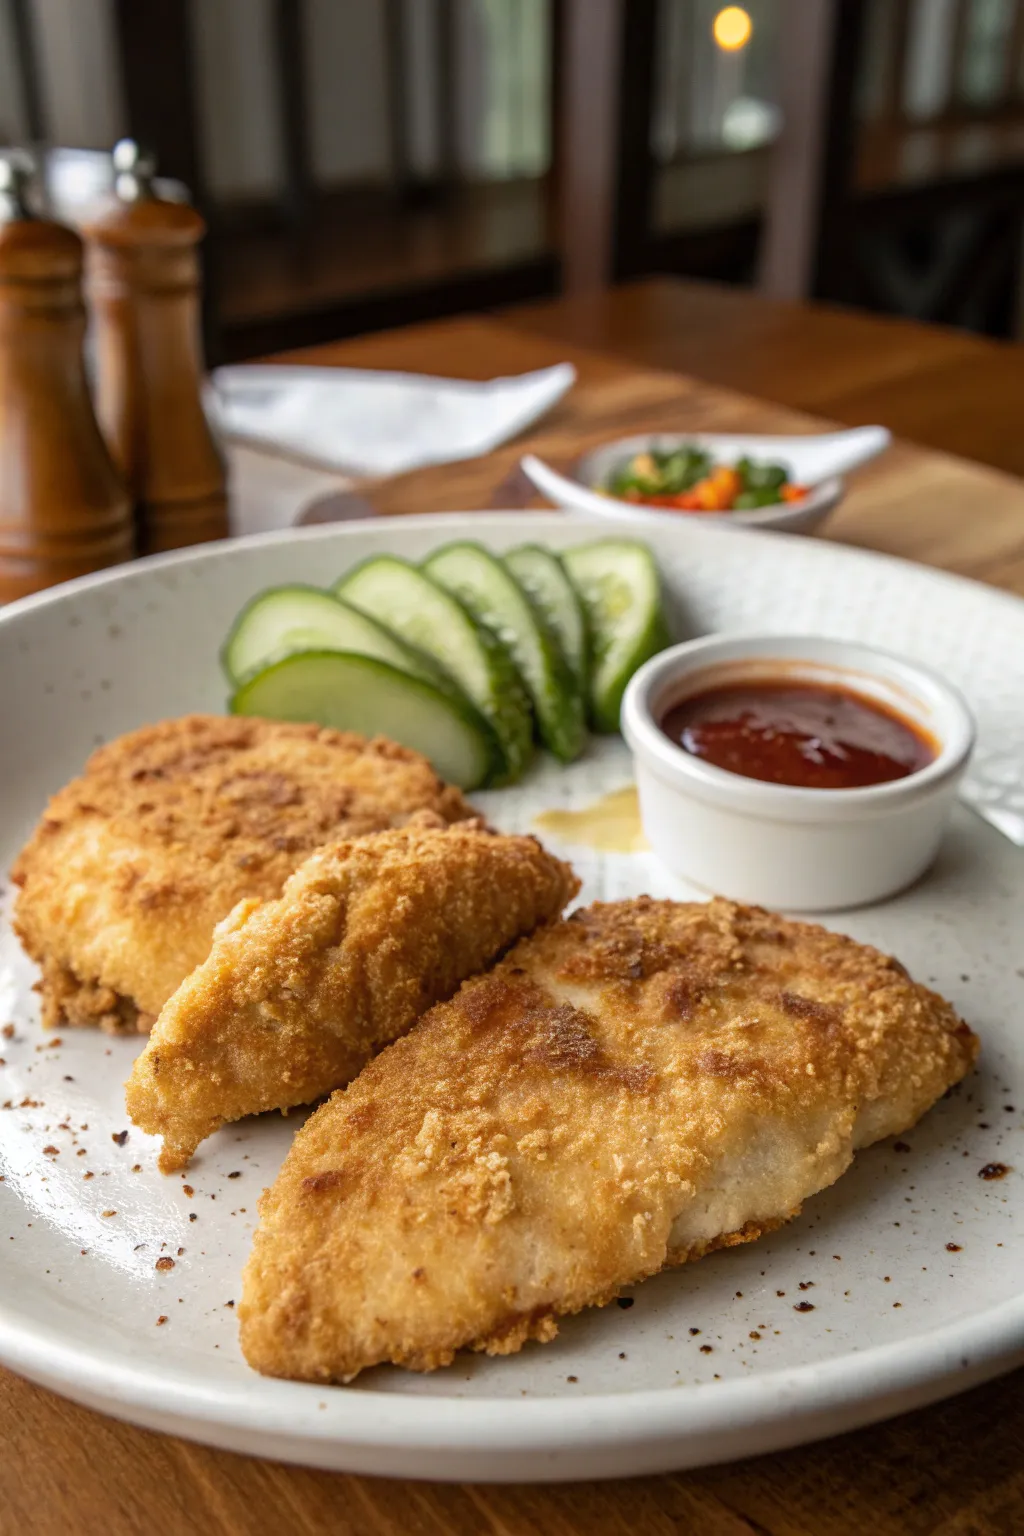
Final Dish Presentation
After your last flip, you should have tender chicken livers in an air fryer that look crunchy on the outside and juicy inside. At this point, I let them rest for just a minute or so on a platter lined with paper towels to catch any extra oil. Then, I move them to my favorite serving dish.

Serving Suggestions and Little Extras
- Dipping Sauces: Some days I’ll serve these with a spicy mustard or a tangy sauce made from Greek yogurt, fresh herbs, and lemon juice.
- Greens & Veggies: Pile the crispy livers on a bed of lettuce, or place them next to some blistered tomatoes.
- Carbs: Turn these into a proper homemade air fryer chicken liver dinner by pairing them with mashed potatoes, roasted veggies, or rice.
Sometimes, I serve them on toast with caramelized onions for a kind of open-faced sandwich. That’s how I discovered a quick air fryer chicken liver meal at 7 a.m. one day when I just needed breakfast fast, but also wanted something special.
Troubleshooting & Lessons Learned
I’ve definitely had my share of mistakes with this recipe:
- Overcooking: If you let them cook too long, they get dry. Keep an eye on the timer and flip them as soon as one side is done.
- Too Bland: Chicken livers have a distinct flavor, but they thrive on seasoning. Add enough salt, pepper, or your favorite herbs. A bit of spice goes a long way.
- Soggy Exterior: Crowding the fryer basket leads to steaming instead of crisping. Arrange them in a single layer or cook in batches.
- Metallic Taste: If that taste is strong, soak them a bit longer or rinse them. Buttermilk marinade also helps.
I once tried an extra-thick coating because I thought it would yield the best crunch, but it ended up gummy. A lighter dusting or a panko-based coat leads to that crispy breaded chicken livers in air fryer texture without being heavy.
Making It Your Own
- Panko-Crusted Version: If you want panko-crusted chicken livers in an air fryer, just swap your regular bread crumbs for panko and maybe add a sprinkle of parmesan cheese if your diet allows.
- Gluten-Free Air Fryer Chicken Liver Ideas: Sub in gluten-free flour and bread crumbs, or go without breading altogether.
- Keto-Friendly Air Fryer Chicken Liver Recipe: Skip flour and bread crumbs. Stick to herbs, salt, and pepper. It’s still delicious and super easy.
- Air Fryer Chicken Livers and Onions: Cook onions separately or add them in late so they don’t burn. They turn sweet and add a nice texture.
- Air Fryer Chicken Livers Without Breading: Just pat them dry, season, and cook. It’s a quick method that results in fewer carbs.
Some travelers claim they grew up on southern-style chicken livers in an air fryer. When I first tried that approach, I added a pinch of cayenne for that southern kick.
Plating & Presentation
I love placing these on a bright platter with some chopped fresh parsley. A drizzle of lemon over top can add a refreshing zing. If I’m making an air fryer recipe for liver and onions, I’ll often scatter the caramelized onions on top or arrange them to one side. Presentation might seem trivial, but I always smile a little bigger when I see a pretty plate. It’s perfect for a homemade air fryer chicken liver dinner you can share with friends.
Storage & Leftovers
On the rare occasion I have leftovers:
- Refrigeration: I place them in an airtight container and keep them in the fridge. They’re best eaten within two days.
- Reheating: I pop them back into the air fryer at 300°F for about 4–5 minutes. They won’t be as crispy as the first time, but they still hold up pretty well. If you microwave them, they’ll lose that crunch.
- Freezing: I rarely freeze cooked chicken livers, but if you do, thaw them in the fridge before reheating in the air fryer to maintain tenderness.
Nutritional Notes & Serving Sizes
A single serving of these air-fried livers (about 4 ounces) can be quite nutrient-dense. Chicken livers are known for their iron and vitamin A content. Keep in mind, I’m not a medical professional, so for any specific dietary concerns, it’s always wise to consult a doctor or nutritionist. Generally, if you’re mindful of the oil used, you’re looking at a moderate-calorie dish that packs protein and minerals in every bite.
Frequently Asked Questions
How do I make this recipe gluten-free?
To make it gluten-free, avoid regular flour and bread crumbs. Substitute rice flour (or a similar gluten-free flour) and gluten-free bread crumbs. You can also skip any breading altogether if you prefer.
Can I cook them at a different temperature for more crispiness?
You can go up to 385°F, but keep a close watch so you don’t burn the crust or dry out the livers. They may only need around 8–9 minutes total at that temperature.
What if I don’t have buttermilk for marinating?
You can soak the livers in regular milk or a non-dairy yogurt alternative. Some folks use a mild vinegar and water mix. Just keep the soaking time around 20–30 minutes.
Can I freeze these after cooking?
It’s possible, but they won’t taste quite the same. If you do freeze them, let them thaw in the fridge and reheat in the air fryer. They’ll still have decent flavor but might lose some crispiness.
Do I need to wash or rinse the livers before marinating?
I usually rinse them under cold water to remove any visible residue or leftover sinew, then pat them dry. This step also helps reduce any metallic taste.
Is there a best oil for air-fried chicken livers?
I typically reach for avocado oil when I want a high smoke point. Olive oil works nicely too. Both provide a pleasant flavor and help achieve that crisp exterior.
Can I add bacon bits for extra flavor?
Some might want air-fried chicken livers with bacon bits, but I skip any kind of pork. If you like that smoky flavor, you can achieve something similar with smoked paprika or adding a bit of turkey-based sausage on the side.
My Personal Wrap-Up
After countless attempts, I can confirm that this air fryer chicken liver recipe (9th use) is my go-to when I’m craving a quick dish that marries hearty flavor with lighter cooking. There’s so much room to play around with seasonings, coatings, and pairings. Whether you opt for a simple air fryer chicken liver dinner (10th use) with onions or whip up a spicy marinade, the air fryer has your back.
I hope you give this method a shot. It’s been a part of my rotation for months now, and I always appreciate how consistent the results can be. Feel free to ask any questions or share your own experiences. Maybe you found a brilliant marinade I haven’t tried yet!
For more recipe ideas, connect with me on my
Facebook Page.
Happy cooking—and here’s to many more delicious meals in your air fryer!
Print
Unleash Savory Flavors with our Air Fryer Chicken Liver Recipe!
- Prep Time: 20 minutes
- Cook Time: 15 minutes
- Total Time: 35 minutes
- Yield: 4 servings 1x
- Category: Appetizer
- Method: Air Fry
- Cuisine: American
Description
A flavorful and crispy air-fried chicken liver recipe that marries hearty flavor with lighter cooking, perfect for a quick and delicious meal.
Ingredients
- 1 1 pound chicken livers, trimmed of any connective tissue
- 1 1 cup buttermilk
- 1 1 teaspoon salt (i like kosher salt)
- 1 1 teaspoon ground black pepper
- 1 1 teaspoon smoked paprika (adds a great touch of flavor)
- 2 2 tablespoons all-purpose flour (optional, for a slight crispy coat)
- 0.5 ½ cup bread crumbs or panko (optional for that crispy breaded chicken livers in air fryer feel)
- 2 2 tablespoons oil (avocado oil or olive oil—either can be the best oil for air-fried chicken livers)
- 0 optional extras: sliced onions, fresh herbs, or any spices you enjoy
Instructions
- Remove the livers from the marinade.
- Pat them gently with paper towels to remove excess moisture.
- In a small bowl, combine flour, bread crumbs (or panko), smoked paprika, and any other spices you prefer. If you’re looking for air fryer chicken livers without breading, you can skip this coating entirely and just season them.
- Lightly dredge each piece in your coating mix.
- Shake off any extra coating—you don’t want clumps.
- Set them aside on a plate, ready for the air fryer.
- Preheat the air fryer to 375°F (around 190°C). Preheating helps the livers develop even crispness.
- Lightly spray or brush the air fryer basket with oil.
- Arrange the livers in a single layer—try not to crowd too many, or they might steam.
- Cook for about 8–10 minutes. Then carefully flip them over using tongs.
- Cook for another 3–5 minutes until they’re golden brown and the internal temperature hits at least 165°F (as recommended by USDA guidelines).
- Peek inside one piece to confirm it’s no longer pink or bloody. You want them tender, not chalky.
Notes
Feel free to adapt the ingredients for dietary preferences such as keto-friendly or gluten-free options.
Nutrition
- Serving Size: 1 serving
- Calories: 230
- Sugar: 1g
- Sodium: 600mg
- Fat: 12g
- Saturated Fat: 3.5g
- Unsaturated Fat: 7g
- Trans Fat: 0g
- Carbohydrates: 10g
- Fiber: 1g
- Protein: 23g
- Cholesterol: 410mg

Leave a Comment